Secure a waterproof backpack to a kayak deck with a four point tie: two shock cord crossings over the body, tensioned at 30 to 40 percent elongation, plus two 25 millimetre cam straps or deck line loops anchored to fixed pad eyes rather than to the cord itself. The pack should not shift more than 20 millimetres when the boat is rolled to 30 degrees on land, and its centre of mass should sit below 25 centimetres above the deck so a capsize does not raise the combined centre of gravity enough to slow the righting moment. Use 5 millimetre shock cord for loads up to 10 kilograms and 6 millimetre above that, replace any cord showing flat spots or a chalky surface, and never anchor to a rod holder, a hatch lip or a rudder line. Re-check tension after the first 20 minutes afloat, because new cord takes a set and loses roughly 10 percent of its tension. Total rigging time on a familiar deck is 6 to 9 minutes, and the whole rig should release in under 15 seconds with one hand.
Where on the Deck a Pack Belongs
Deck position matters more than the knot. A pack stored aft of the cockpit keeps the bow light and the boat tracking, but it puts weight behind the paddler where a following sea can lift the stern and reduce control; a pack stored on the forward deck keeps weight central and improves trim in chop, at the cost of reaching further for anything you need mid paddle. For most touring hulls between 4.2 and 5.2 metres, the forward deck within 60 to 90 centimetres of the cockpit rim gives the best compromise.
The governing number is the height of the combined centre of mass above the waterline. Every kilogram raised by 10 centimetres measurably slows the righting moment of a narrow hull, and a 12 kilogram pack strapped 35 centimetres above the deck behaves very differently from the same pack sitting 18 centimetres above it. Lay the pack flat rather than stacking it, spread rather than pile, and keep the heaviest items in the lower third of the pack body.
| Deck position | Effect on trim | Reach from cockpit | Best for |
|---|---|---|---|
| Forward deck, 60 to 90 cm ahead | Central weight, better chop handling | Easy, one arm reach | Day touring and general use |
| Directly ahead of the cockpit rim | Neutral trim, quickest access | Very easy | Camera, snacks, waterproof chart |
| Aft deck behind the seat | Stern heavy, lifts in following seas | Requires a twist | Sheltered water only |
| Inside the rear hatch | Lowest centre of mass by far | Requires landing to access | Bulky dry gear not needed afloat |
| Side deck beside the cockpit | Asymmetric, induces weathercocking | Easy but obstructs paddle stroke | Not recommended |
Whatever the position, keep the deck clear where you brace and where you re-enter after a swim. A pack strapped across the re-entry zone turns a routine self rescue into a struggle, and more than one paddler has come off a deck rigging that held perfectly while making the recovery impossible. Leave the 40 centimetres immediately aft of the cockpit clear on both sides and treat that gap as non negotiable.
Choosing Between Shock Cord, Cam Straps and Deck Line
Three systems appear on kayak decks and they behave differently. Shock cord, often called bungee, holds a load by continuous tension and tolerates a hull flexing under a wave, which is why it is the default for cruising loads up to about 10 kilograms. Cam straps hold by friction against a fixed length and do not stretch, which makes them better for heavy or rigid loads but worse for anything that settles. Deck line, usually 3 to 4 millimetre static cord, is for tethering rather than holding, and using it as the primary restraint is the most common rigging mistake on the water.
| Attachment method | Typical size | Working capacity | Behaviour and best use |
|---|---|---|---|
| Shock cord, single braid | 4 millimetre | Up to 6 kilograms | Light dry bags, gloves, chart |
| Shock cord, double braid | 5 millimetre | 6 to 10 kilograms | Default for a 30 litre pack |
| Shock cord, heavy | 6 millimetre | 10 to 16 kilograms | Expedition loads, camera cases |
| Cam strap, polyester webbing | 25 millimetre | 150 to 250 kilograms breaking | Rigid cases, hatches, coolers |
| Deck line, static | 3 to 4 millimetre | Tether only, not a restraint | Secondary safety leash |
| Pad eye and toggle system | Standard kayak fitting | Depends on fastener and backing | Fixed anchor point for any method |
Anchor to structure, never to convenience. A pad eye backed with a plate spreads the load across the hull; a rod holder, a hatch lip, a rudder line or a bungee loop passed through another bungee loop does not. Shock cord degrades under ultraviolet exposure long before it looks bad, and a five year old deck rig that has never been replaced commonly fails at 40 to 60 percent of its original tension, usually at the knot rather than along the run.
The Four Point Tie, Step by Step
A four point tie takes about 6 to 9 minutes on a familiar deck and releases in under 15 seconds with one hand. The principle is that two independent systems hold the pack: the shock cord provides continuous downward pressure, and the straps or deck line loops prevent fore and aft migration. Either alone will work in flat water; together they survive a capsize and a re-entry.
- Empty the pack of anything that must stay dry but has not been double bagged, then close the roll top with four full turns and clip the buckle across rather than down.
- Lay the pack flat on the deck with its long axis along the hull, and push it forward until it touches the permanent deck fitting so it cannot migrate aft.
- Pass the first shock cord over the pack body at roughly one third of its length, hook both ends to the nearest pair of pad eyes, and pull to 30 to 40 percent elongation.
- Repeat at two thirds of the pack length with a second cord, crossed over the first so the crossing point presses on the pack rather than on the deck.
- Add two 25 millimetre cam straps or deck line loops to fixed pad eyes, one at each end, to stop fore and aft movement that the cords cannot resist.
- Press down hard on each corner and sideways on each end; the pack should not shift more than 20 millimetres in any direction.
- Tie a short tether from a grab loop on the pack to a deck line, long enough to let you lift the pack clear but short enough that it cannot wash overboard.
Two details decide whether the tie survives the day. Cross the cords over the load rather than running them parallel, because parallel cords let the pack rotate out from under them when a wave lifts one side. And tension by elongation rather than by feel: measure a 30 centimetre relaxed length, stretch it to 39 to 42 centimetres, and you are inside the working range for most double braid cord at 5 millimetres.
Chafe, Abrasion and What Wears Through First
Deck rigging fails at contact points long before it fails in open water. A pack pressing on a cord at a single sharp corner will wear a flat spot through the braid in 20 to 40 hours of paddling, and a flat spotted cord loses most of its remaining strength at that exact point. The second failure site is the pack body itself, where a laminated shell rubbing on a hatch lip or a rough deck fitting abrades the coating rather than the fabric beneath it.
| Contact point | Typical wear rate | Sign to watch for | Remedy |
|---|---|---|---|
| Cord over a pack corner | Flat spot in 20 to 40 hours | Shiny flattened braid | Rotate the cord or add a sleeve |
| Pack shell on a hatch lip | Coating dulling in 30 to 50 hours | Grey scuff that will not rinse off | Add a foam pad or neoprene sleeve |
| Cord under a buckle | Crease and fibre break in 60 hours | White stress line at the bend | Replace the cord section |
| Deck fitting on the hull | Gelcoat star cracks | Spider cracks radiating outward | Fit a backing plate |
| Strap cam teeth on webbing | Fuzz and slip under load | Strap creeps on a hard pull | Replace strap, check the load |
Abrasion resistance in coated fabrics is measured by published methods rather than by opinion, and the relevant test numbers are maintained by ASTM. Citing the method and the cycle count in a specification turns a marketing claim into something measurable, and it is the fastest way to compare two shells that look identical in a photograph. Construction detail on welded seams is set out in the welded seam explainer.
Capsize, Righting and Load Height
A capsize is the test that deck rigging either passes or fails. The physics is simple and unforgiving: raising mass above the deck raises the combined centre of gravity of the boat and its load, which reduces the righting moment that brings the hull upright. On a narrow touring hull with a paddler aboard, moving 12 kilograms from 18 centimetres to 35 centimetres above the deck can increase the time to self right by a noticeable margin and make an assisted rescue materially harder.
| Load height above deck | 12 kg effect on stability | Self righting behaviour | Verdict |
|---|---|---|---|
| 10 to 18 centimetres | Minimal effect | Rights normally, load stays put | Recommended |
| 19 to 25 centimetres | Slight reduction in righting moment | Rights with a small delay | Acceptable for sheltered water |
| 26 to 35 centimetres | Noticeable reduction | Slow to right, may need a brace | Avoid on narrow hulls |
| Above 35 centimetres | Significant reduction | May invert and stay inverted | Not acceptable |
| Inside the hull, below waterline | Improves stability | Best possible behaviour | Best for heavy dry gear |
Personal flotation is not part of the rigging decision but it is part of the same safety picture. Carriage requirements, approved device types and the rules for their condition and accessibility are published by the United States Coast Guard, and the requirements differ by jurisdiction and by vessel length. Water temperature governs how long a swimmer has: cold water immersion guidance is published by CDC, and the practical conclusion is that a rig which delays re-entry by even 30 seconds matters far more than one which merely loses a dry bag.
Keeping Gear Reachable Without Unrigging
Anything you need while afloat should be reachable without touching the rig. Water, snacks, a chart or a phone in a dry pouch belong in a cockpit bag, a deck bag with a quick release, or a pocket on the pack that faces the cockpit and closes independently of the main roll top. Reaching behind you to unclip a shock cord while sitting in a moving hull is how gear goes overboard, and it is also how paddlers end up in the water.
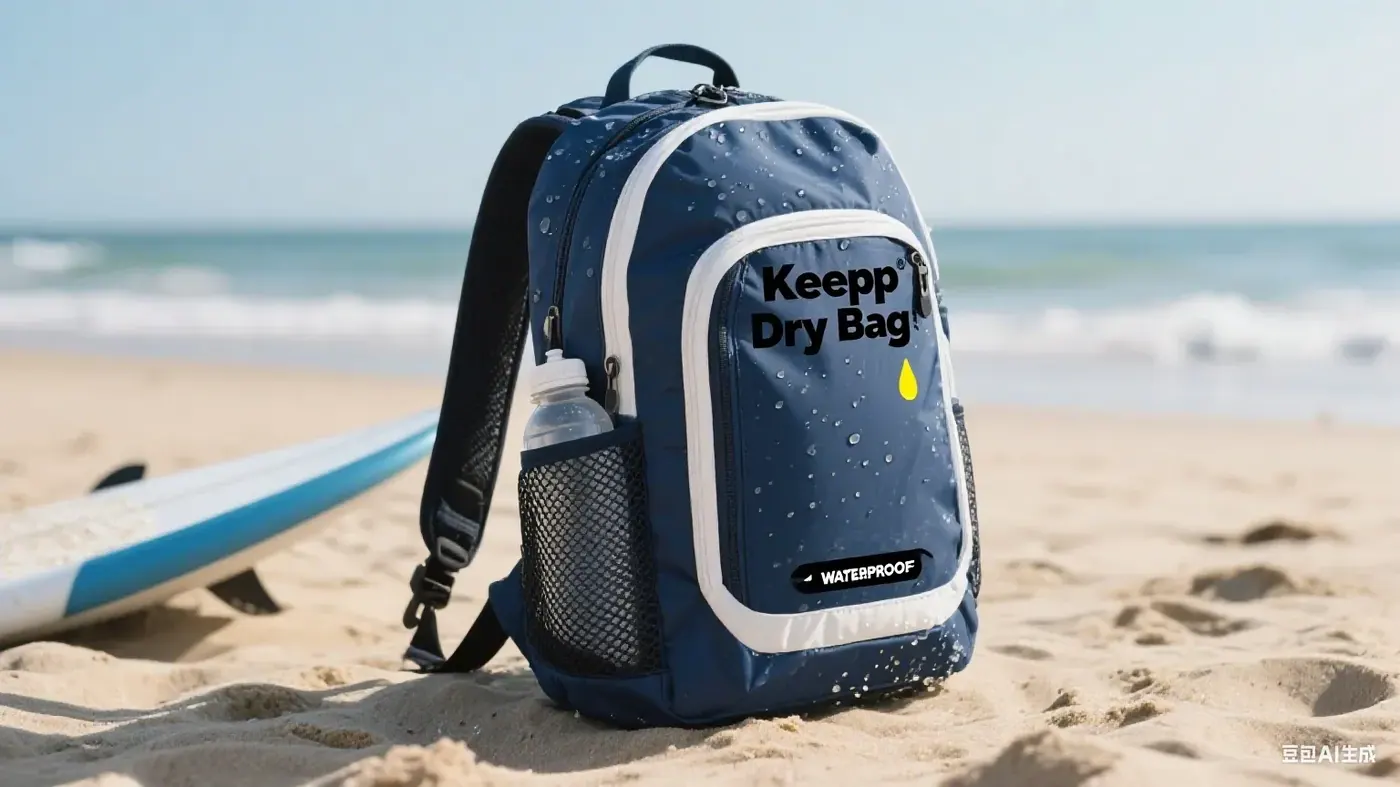
Divide the load by access frequency rather than by weight. Roughly 1 to 2 kilograms of items wanted during the day should live in an externally accessible pocket or a small deck bag; the remaining 8 to 14 kilograms, wanted only at camp, can be strapped down hard under both cords. A pack with a front facing zippered pocket saves unrigging, provided that pocket is itself rated for spray, and the difference between an airtight closure and a water resistant one is explained in the closure comparison.
Salt, Sun and the Rinse After Every Trip
Salt water and ultraviolet exposure do more damage to deck stowed gear than the water the pack is rated against. Salt crystals work into a zipper track and into the braid of a shock cord, where they abrade and hold moisture; ultraviolet exposure embrittles both the outer braid and the coating of the pack shell. A pack stored on a deck for a season without rinsing shows the result within roughly 60 to 90 days of regular use, usually as a chalky surface and a stiff collar.
- Rinse the pack, cords and straps in fresh water for 60 to 90 seconds after every salt water trip, including the buckles and zipper tracks.
- Undo the collar fully and rinse inside it, because salt concentrates where fabric folds and where the roll is made.
- Dry in shade rather than direct sun; ultraviolet exposure is cumulative and shade drying roughly doubles coating life.
- Replace shock cord every 24 months in regular use, or immediately if a flat spot, a crease or a chalky surface appears.
- Store the rigging loose rather than tensioned, since a cord left stretched for months takes a permanent set and loses tension.
Fresh water and warm storage introduce a different problem: a pack put away damp grows mould inside the collar and under the back panel within 7 to 14 days. Dry for a full 24 hours with the collar open and the body inverted before storage, and check the inside of the collar before the first trip of a season. Long term storage method is covered in the long term storage guide, and salt exposure on hardware is dealt with in the saltwater corrosion notes.
Rigging Checks Before You Launch
Five checks take 90 seconds and prevent most of what goes wrong afloat. Run them in the same order every time so they become habit rather than memory, and repeat the tension check 20 minutes into a trip, because new cord takes a set and typically sheds about 10 percent of its initial tension in that window.
- Push each corner down hard and each end sideways; movement above 20 millimetres means re-tension before launch, not after.
- Confirm both cords are crossed over the pack body rather than running parallel to it, and that neither touches a hatch lip.
- Confirm both straps or tether loops are anchored to pad eyes with backing plates, never to a rod holder or a hatch rim.
- Confirm the re-entry zone, the 40 centimetres aft of the cockpit on both sides, is completely clear of gear.
- Confirm the tether is long enough to lift the pack clear but short enough that it cannot wash overboard in a capsize.
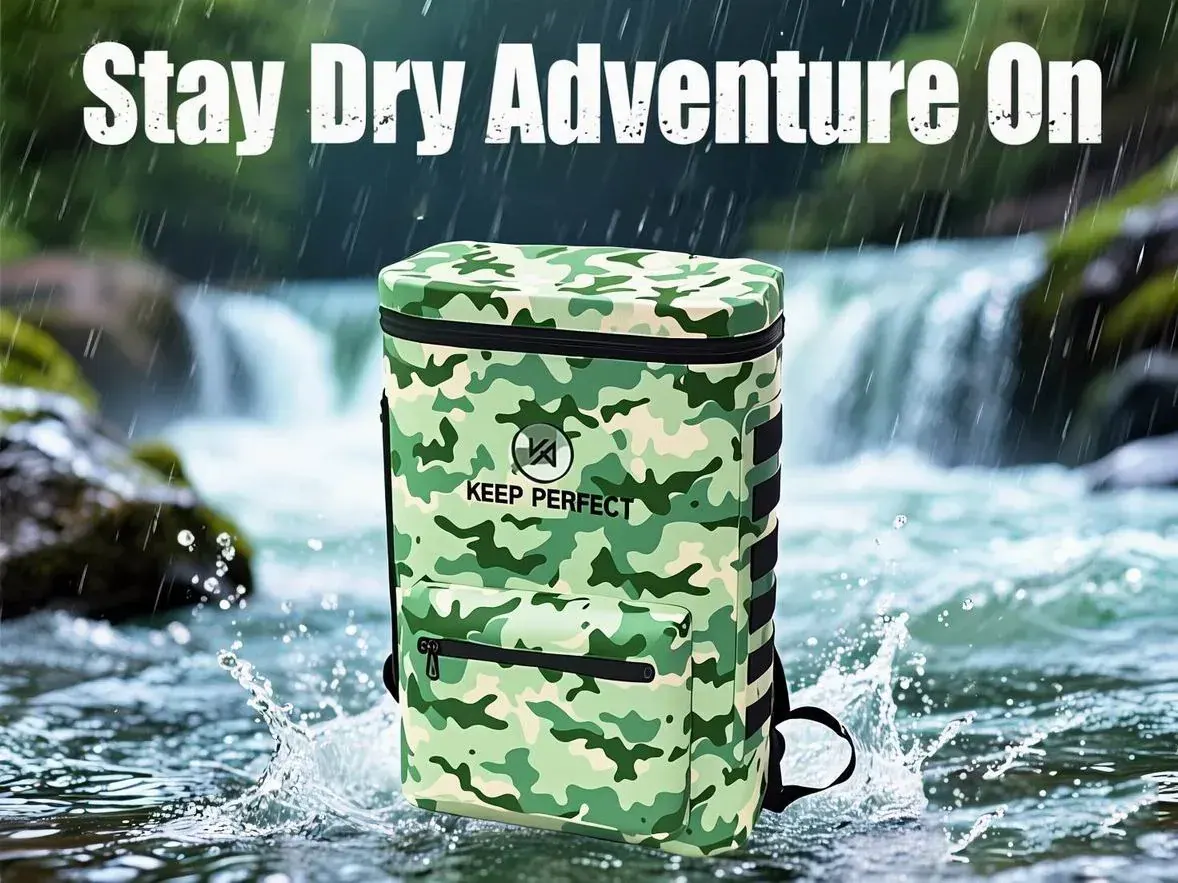
Float behaviour is worth testing once, on land, in a pool. Pack the bag as you would for a trip, close the collar with four turns, and push it under: a body with trapped air should return to the surface within 3 to 6 seconds and float with roughly 20 to 30 percent of its volume above water. Buoyancy does not make a pack safe to lose, but it converts a loss into a recovery, and buoyant designs are covered further in the floating waterproof backpack range.
What to Specify When Ordering Deck-Rated Packs
Deck stowage is a harsher duty cycle than carrying, and a pack specified for it differs from a general hiking body in five measurable ways. Each of these belongs in a written specification with a number against it, because none of them is visible in a product photograph and all of them determine whether a season of paddling ends with the pack retired early.
| Specification | Deck duty setting | General hiking setting | Why it differs |
|---|---|---|---|
| Shell coating thickness | 0.45 to 0.60 millimetres | 0.30 to 0.40 millimetres | Abrasion against hatch lips and fittings |
| Seam construction | Welded throughout | Welded body, taped details | No stitch holes at deck contact points |
| Closure | Roll top, four turns, 200 mm collar | Roll top or water resistant zip | Zipper tracks hold salt crystals |
| External attachment points | Four reinforced lash points, 25 mm webbing | Two daisy chains | Four point tie needs four anchors |
| Hardware finish | Marine grade, salt spray rated | Standard anodised | Salt spray pits standard finishes |
| Colour and UV package | UV stabilised pigment, mid tone | Any colour | Dark shells run hotter, fade faster |
Programme entry for a deck rated body is 500 pcs per design and colour, with prototypes in 6 to 10 working days and bulk production in 35 to 50 days. Expect a deck rated specification to add 8 to 14 percent to unit cost against a general body of the same volume, almost all of it in coating thickness and hardware finish, and expect that premium to be recovered in service life rather than in appearance. Range options for paddling are set out in the kayaking guide, and construction detail at the higher immersion codes is covered in the submersible technology explainer.
QUANZHOU JUNYUAN BAGS has specified waterproof bodies for marine duty since 2014, with the founding team in the industry since 2004, monthly output of 200,000 units verified by SGS and certification to BSCI and ISO 9001. Programme entry is 500 pcs per design and colour, prototypes in 6 to 10 working days, bulk in 35 to 50 days, FOB Xiamen or DDP into more than 100 countries. Materials are screened against REACH and California Prop 65, every order is inspected at AQL 2.5 before release, and coating thickness is stated in millimetres on every specification rather than described in words. Deck lashing layouts, hardware finish options and abrasion test references are published. Enquiries go to service@junyuanbags.com.
People Also Ask
What is the best way to tie a dry bag to a kayak?
Use a four point tie: two 5 millimetre shock cords crossed over the body at one third and two thirds of its length, tensioned to 30 to 40 percent elongation, plus two 25 millimetre cam straps or tether loops anchored to backed pad eyes.
How tight should kayak bungee cords be?
Tension by elongation rather than feel. Measure a 30 centimetre relaxed length and stretch to 39 to 42 centimetres, which is 30 to 40 percent elongation. The load should not move more than 20 millimetres when pushed hard at each corner.
Can I strap a backpack behind the seat of a kayak?
Only in sheltered water. Aft storage makes the stern heavy and lifts in a following sea, and it forces a twist to reach anything. Forward deck storage 60 to 90 centimetres ahead of the cockpit handles better.
What diameter bungee cord for a kayak deck?
4 millimetre for loads under 6 kilograms, 5 millimetre for 6 to 10 kilograms, and 6 millimetre for 10 to 16 kilograms. Replace deck cord every 24 months in regular use, or immediately when a flat spot appears.
How high can I strap gear on a kayak deck?
Keep the centre of mass below 25 centimetres above the deck, and prefer 10 to 18 centimetres. At 26 to 35 centimetres the righting moment drops noticeably; above 35 centimetres a narrow hull may not self right.
Do I need to rinse a waterproof pack after salt water?
Yes, for 60 to 90 seconds in fresh water including buckles and zipper tracks, with the collar opened and rinsed inside. Salt crystals abrade the braid and hold moisture, and unrinsed deck gear shows chalking within 60 to 90 days.
Frequently Asked Questions
Q1. How do I attach a waterproof backpack to a kayak deck?
Lay the pack flat along the hull, push it against a permanent deck fitting, cross two 5 millimetre shock cords over it at one third and two thirds of its length, then add two 25 millimetre cam straps or tether loops to backed pad eyes. Tension to 30 to 40 percent elongation and confirm movement stays under 20 millimetres.
Q2. Which is better, bungee cord or cam straps?
Use both. Shock cord maintains continuous tension as the hull flexes under a wave, while cam straps prevent fore and aft migration that stretchy cord cannot resist. Cam straps alone are fine for rigid cases; shock cord alone is fine for loads under 6 kilograms in flat water.
Q3. Where should I put a dry bag on a kayak?
Forward deck, 60 to 90 centimetres ahead of the cockpit rim, gives the best combination of trim and reach. Heavy dry gear that is not needed afloat belongs inside the hull, which is the lowest and most stable place on the boat.
Q4. How often should kayak deck cord be replaced?
Every 24 months in regular use, and immediately if you see a flat spot, a crease at a buckle, or a chalky surface. Ultraviolet exposure degrades the braid long before it looks bad, and aged cord commonly fails at 40 to 60 percent of its original tension.
Q5. Can I anchor the rigging to a rod holder or hatch rim?
No. Anchor only to pad eyes backed with a plate, which spread the load across the hull. Rod holders, hatch lips, rudder lines and a cord looped through another cord are all failure points under a capsize load.
Q6. Will a strapped pack stop my kayak self righting?
It can, if it is stacked too high. Keep the centre of mass below 25 centimetres above the deck; between 26 and 35 centimetres the righting moment drops noticeably, and above 35 centimetres a narrow hull may invert and stay inverted.
Q7. How do I stop the pack from sliding fore and aft?
Shock cord resists vertical movement well and horizontal movement poorly. Add two 25 millimetre cam straps or short deck line loops at each end of the pack, anchored to pad eyes, and push the pack against a permanent deck fitting so it cannot migrate aft.
Q8. Should the pack float if it comes off the deck?
It should. Pack the bag, close the collar with four turns and push it under in a pool: it should surface within 3 to 6 seconds and float with 20 to 30 percent of its volume above water. Buoyancy does not make a pack safe to lose but it converts a loss into a recovery.
Q9. How long does it take to rig a pack on a kayak deck?
Six to nine minutes on a familiar deck, and the rig should release in under 15 seconds with one hand. Allow an extra two minutes for the 20 minute re-tension check, since new cord takes a set and sheds about 10 percent of its tension.
Q10. What coating thickness should a deck stowed pack have?
0.45 to 0.60 millimetres for deck duty against 0.30 to 0.40 millimetres for general hiking, because deck stowage abrades the shell against hatch lips and fittings. Ask for the figure in millimetres and the abrasion test method in the specification.