Bags for kayaks and paddle boards differ from every other fishing bag in three measurable ways: they must sit low, they must be leashed, and they must drain. Practical specifications start with a base height under about 200 millimetres so nothing raises the centre of gravity, four tie points each rated beyond 50 kilograms, drain openings of 8 to 10 millimetres at every corner of the floor, and two to three kilograms of net buoyancy so a bag that goes overboard can actually be recovered. Anything designed for a bank or a boat deck usually fails all three tests.
The Paddle Environment in Numbers
Two numbers explain why ordinary bags disappoint here. The first is how close the water is: on a sit-on-top the footwell regularly holds 10 to 30 millimetres of water, and a paddle board deck is washed by every passing wake, so anything set low sits in water for most of a session. The second is consequence: whatever goes overboard is gone within seconds unless it floats and it is tethered, and recovery is not a matter of walking over to retrieve it.
| Condition | Typical figure | Consequence |
|---|---|---|
| Footwell standing water | 10 to 30 millimetres | Everything low gets wet all session |
| Distance to the current when something drops | Seconds | Nothing is recovered unless leashed |
| Reach from a seated paddling position | 600 to 700 millimetres | Storage outside this arc is unusable afloat |
| Deck temperature on a summer board | Above 45 degrees | Heat softens some coatings |
| Typical bungee grid spacing | 150 to 250 millimetres | Sets where tie loops must sit |
Anyone transferring from boat fishing should expect to rethink everything. A boat bag is designed to sit on a dry deck and be picked up; a paddle bag is designed to be wet, tied down, and used without standing up.
Height Is the First Design Variable
On a paddle board especially, cargo height matters as much as cargo mass. Raising 6 kilograms by 150 millimetres noticeably changes how a board rolls underfoot, because the mass is above the board's own centre of gravity rather than within it. Practical guidance is to keep any deck load below about 200 millimetres tall and distributed across the width rather than stacked upward.
| Load height above deck | Effect on stability | Verdict |
|---|---|---|
| Under 120 millimetres | Barely noticeable | Ideal for anything carried regularly |
| 120 to 200 millimetres | Noticeable roll when moving about | Acceptable if the load is centred |
| 200 to 300 millimetres | Board feels unstable in chop | Only for short crossings |
| Above 300 millimetres | Serious stability penalty plus windage | Avoid entirely on a board |
Width, by contrast, costs almost nothing. A long low bag spanning the deck is far better than a tall narrow one holding the same volume, and that single insight resolves many design arguments before they start.
Tie-Down Points and What They Must Hold
Restraint hardware deserves more attention than it receives, because it is the difference between losing one bag and losing everything. Each loop should survive at least 50 kilograms of straight pull, and ideally rather more, since a capsize applies shock loading rather than static weight. Look for four loops rather than two, positioned so that opposing pairs can be crossed, which prevents the swinging that eventually works webbing free.
- Require four tie points, not two, so loads can be crossed and cannot pivot.
- Check that loops are anchored into reinforced structure rather than a single layer of fabric.
- Use hardware that resists salt; plated components pit within one season of paddle use.
- Keep the tether between one and 1.2 metres so a floating bag cannot foul a paddle or limb.
- Clip to fixed craft hardware: pad eyes, rails or D-rings, never to the paddler or the paddle itself.
Nothing about this guidance replaces personal flotation, and the US Coast Guard is unambiguous that only an approved life jacket counts as life-saving equipment. A tether is equipment recovery, not safety gear, and deserves exactly that standing.
Drainage Beats Sealing
There is a persistent misconception that paddle bags should be fully sealed. In practice water gets in through the top seam, the closure, and simple handling, and once inside a sealed floor holds it permanently. A drained floor empties in seconds and dries underway, which is why almost every experienced paddler prefers four small drain openings to one perfect seal.
| Approach | Behaviour afloat | Behaviour ashore | Verdict |
|---|---|---|---|
| Sealed floor, no drainage | Collects and retains every litre | Must be emptied by tipping | Poor for paddle duty |
| Two drain grommets at the base | Empties slowly; mats of debris block them | Adequate | Acceptable minimum |
| Four drains plus mesh lintels | Empties in seconds with the bag upright | Rinses clean easily | Correct approach |
| Raised welded floor with a sump | Contents stay clear while it drains | Very quick to dry | Best available |
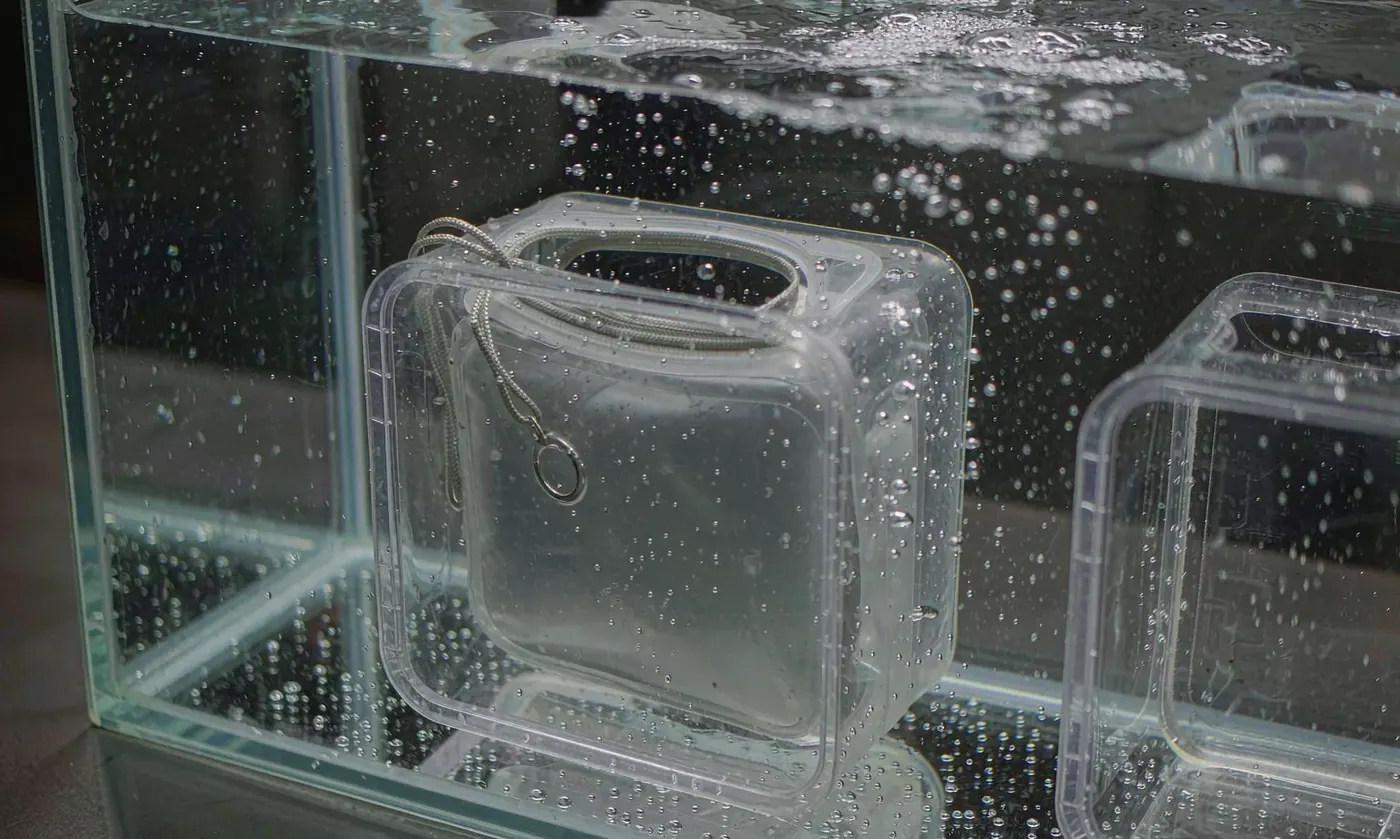
A simple test settles any product: put two litres in the bag and time how long it takes to leave. Anything beyond fifteen seconds will spend the whole session heavy, and that weight sits exactly where it is least wanted.
Buoyancy and Marks
Flotation for paddle bags is not about keeping them dry but about keeping them findable. Two to three kilograms of net lift, typically from three or four litres of closed-cell foam built into the base and walls, keeps a partially loaded bag at the surface long enough to be recovered rather than sinking the moment it takes water.
| Feature | Typical figure | Benefit |
|---|---|---|
| Closed-cell foam in base and walls | Three to four litres | Two to three kilograms of net lift |
| High-visibility panel area | At least 10 percent of surface | Visible a hundred metres away in chop |
| Reflective piping length | One metre or more | Pick-up by torch at dusk |
| Leash attachment point | One reinforced | Guarantees recovery regardless of buoyancy |
Flotation arithmetic is covered in detail elsewhere, and anyone unsure should start there rather than trusting a description. Buoyancy and visibility work together, and a bag that floats but cannot be seen is nearly as lost as one that sinks.
Reach: Storage You Can Actually Use
Afloat access is limited by how far hands can travel while maintaining balance, typically 600 to 700 millimetres from a seated position. Anything stored beyond that arc is effectively stored for shore, and pretending otherwise produces bags packed optimistically and never used as intended.
| Item | Where it belongs | Reason |
|---|---|---|
| Current lures and leaders | Within 700 millimetres of the seat | Needed continuously |
| Pliers and cutters | On the body or beside the seat | Used hook-side several times an hour |
| Water and food | Behind the seat, still reachable | Used hourly rather than constantly |
| Spare clothing and layers | Hull storage or a rear well | Rarely needed before landing |
| Heavy or bulky spare gear | Home or the vehicle | Never justified at this scale |
Rod Storage Alongside Tackle
Rods complicate every paddle storage problem because they are long, fragile, and awkward to secure. A side tube approach transfers impact away from the rod itself and keeps one hand free, provided the two lashing points are separated vertically by at least 300 millimetres and the lower support is closed so the butt cannot slide through when everything is lifted.
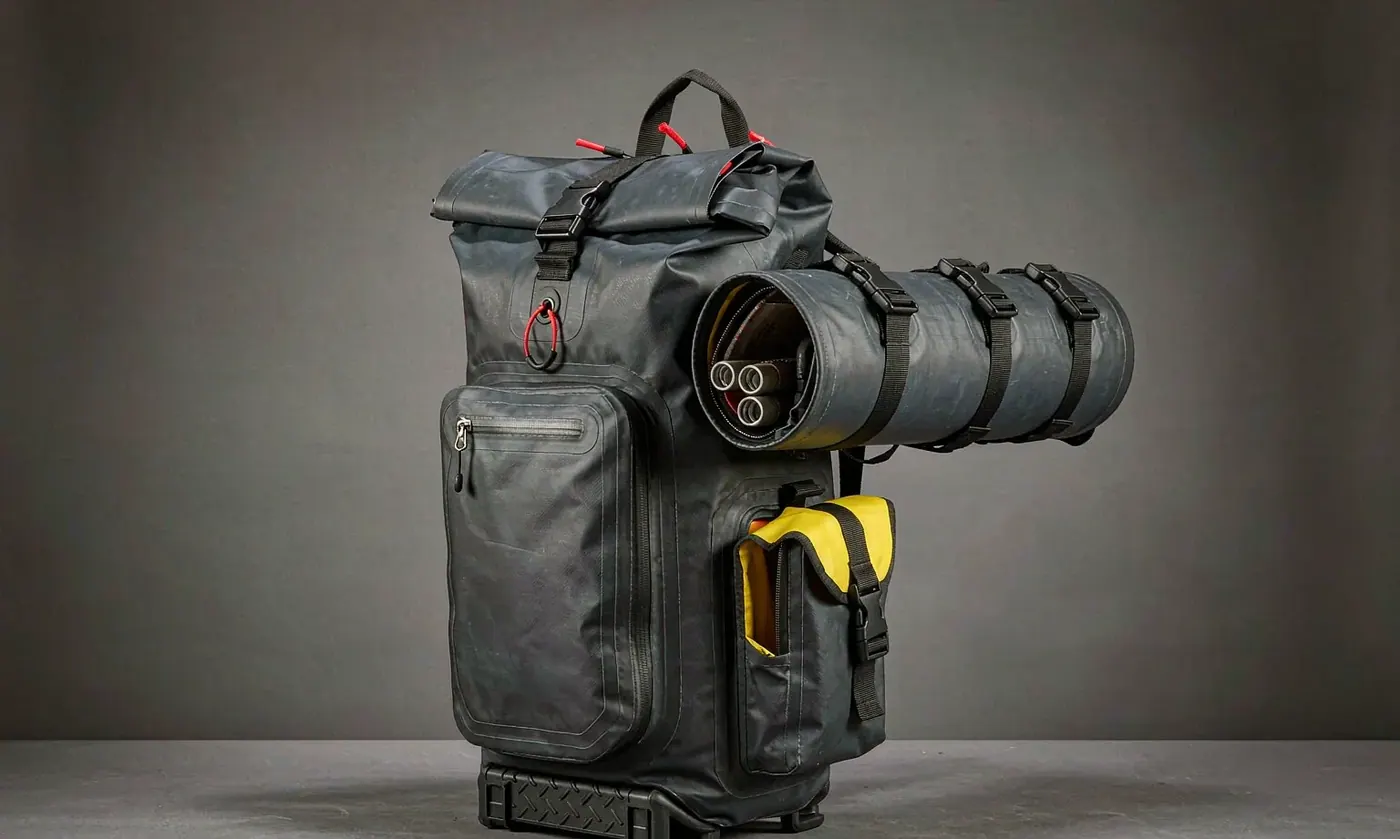
On a paddle board the rule is simpler and harsher: nothing taller than a metre should ride on deck while paddling, since windage and entanglement risk both rise steeply. Many paddlers solve this by carrying rods horizontally along the deck and fitting them after reaching their spot.
Bait, Catch and Temperature
Keeping bait alive and catch cold is a genuine challenge on a craft with no drainage to spare. Insulated units solve it, but only if the ice melt has somewhere to go, and on a kayak that means an insulated compartment with its own drain rather than the bag floor.
| Requirement | Figure | Note |
|---|---|---|
| Insulation thickness | 8 to 12 millimetres | Below 8, ice lasts only a few hours |
| Drain size on the insulated section | 8 to 10 millimetres | Melt water must not enter the tackle space |
| Separation from tackle | Fully lined compartment | Bait residue ruins anything nearby |
| Odour control | Wipeable interior surfaces | Textile interiors are effectively unusable |
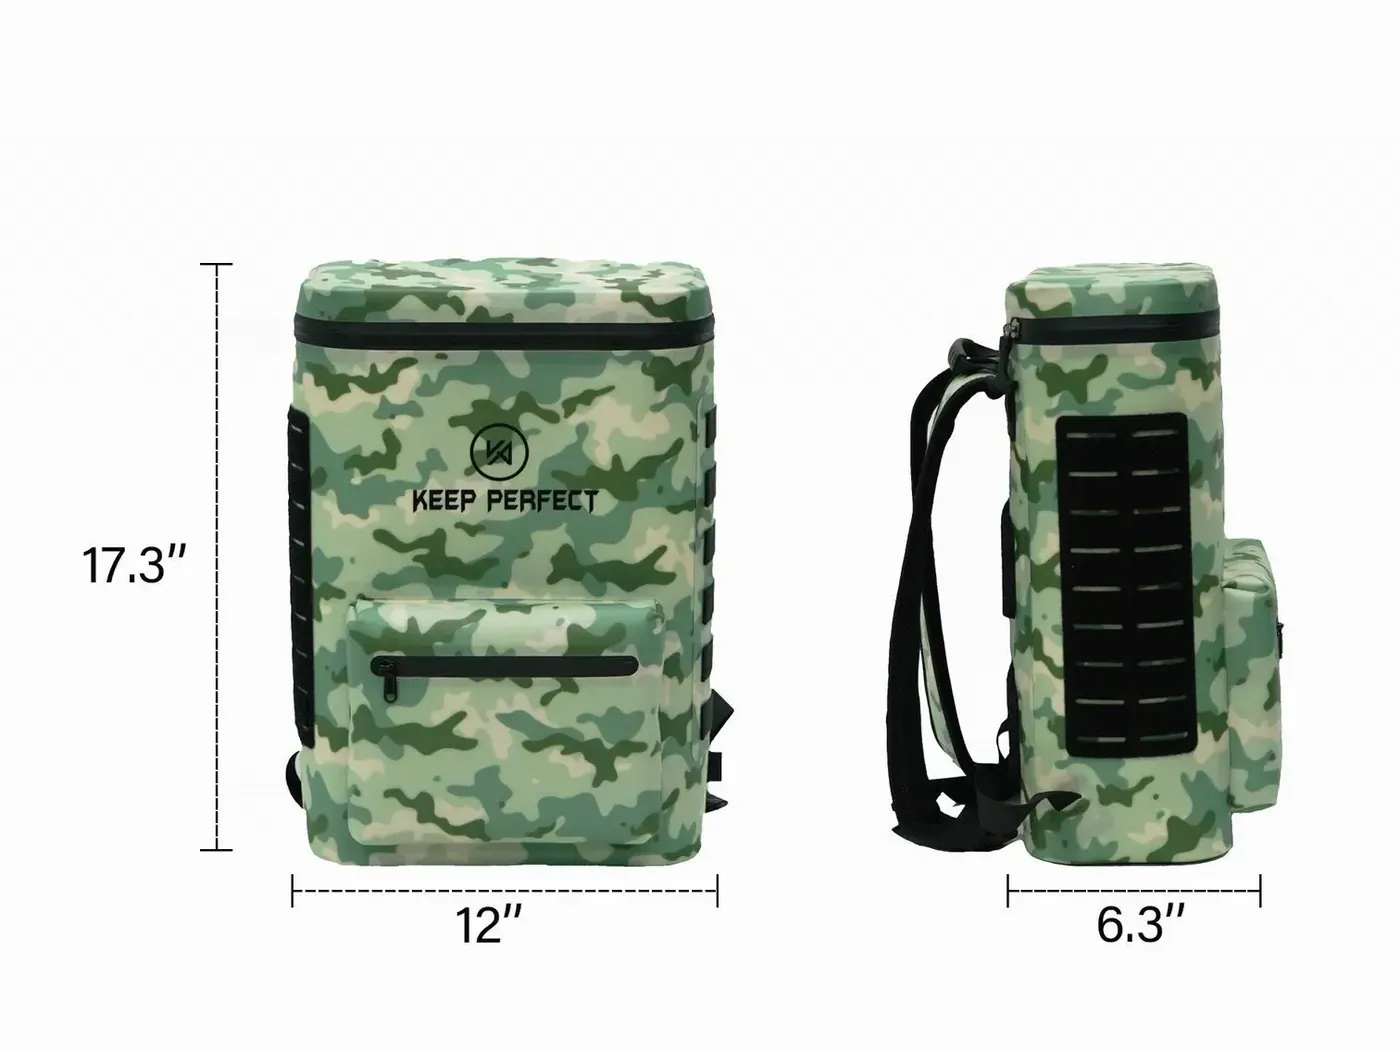
Where space demands one bag rather than two, insist on a fully welded or moulded inner liner rather than a fabric one. Anything that absorbs bait juice becomes permanently unpleasant, and no amount of rinsing recovers it.
Salt, Sun and Care
Paddle use exposes bags to more ultraviolet and more salt per hour than almost any other angling, and the two compound. Sun dries salt onto closures; dried salt abrades everything that then flexes. The countermeasure is routine rather than elaborate, and takes about ten minutes.
- Rinse everything in fresh water at the end of every session, paying particular attention to closures and tie loops.
- Dry open and out of direct sun, since ultraviolet degrades coatings faster than wetting does.
- Rinse and dry the craft's tie-down cord too, since salt-laden bungee abrades everything it touches.
- Check webbing and loops monthly for abrasion where they pass through hardware.
- Store light, dry and loosely packed, so nothing takes a permanent crease.
Sea and weather conditions vary enormously even within one day, and planning around published data from NOAA is a far better basis for deciding how much kit to carry than the outlook at launch time.
Two materials failures deserve particular watch because they arrive without warning. Closures stiffen first, usually noticed as increasing resistance on the slider, followed some weeks later by first leakage. And webbing loses strength invisibly: nothing suggests weakness until a loop tears under load that it had carried dozens of times before. Replacing both on a schedule costs very little and removes the only two failures that genuinely strand equipment.
Comparing Paddle Setups
Five configurations cover almost everything afloat, and most regular paddlers end up using two of them for different days. Each trades reach against volume, which is the same trade every other format makes but sharpened by how little space there is.
| Setup | Volume | Reach afloat | Best for |
|---|---|---|---|
| Crate mounted bag | 15 to 30 litres | Excellent behind the seat | Sit-on-top kayaks with a rear well |
| Deck bag, low profile | 10 to 18 litres | Good within the reach arc | Paddle boards without a bungee crate |
| Soft hatch bag | 5 to 20 litres | No access afloat | Backup gear and clothing in the hull |
| Hip or rail pouch | 2 to 5 litres | Best of all | Tools and leaders used constantly |
| Insulated liner bag | 8 to 20 litres | Reasonable if leashed | Bait, catch and food |
Where only one purchase is possible, the low-profile deck design adapts to both craft better than anything else, since it fits under a kayak bungee and across a paddle board deck without modification.
Loading Sequence for a Stable Craft
Similar loads produce very different handling depending on order, and getting the sequence right costs nothing. Heavy low items go first and central, soft light items fill the gaps last, and nothing heavy belongs forward of the paddler once the craft is afloat.
- Place the heaviest container first, low and as close to the centreline as the craft allows.
- Restrain it before adding anything else, since each later item pushes against something already secured.
- Add medium items either side rather than above, keeping the total height low.
- Fill remaining gaps with soft goods, which also stops everything shifting under way.
- Check trim from the water before leaving the launch rather than after a kilometre of paddling.
That last step catches almost every mistake. A craft that sits bow-down or leans noticeably reveals a loading problem immediately, and moving one container by thirty centimetres often fixes it completely.
Keeping Dry Things Dry
Very little stays dry on a paddle craft, so the sensible strategy is deciding in advance which items must and accepting that everything else will not. Three classes cover it: things that must never get wet, things that survive a soaking, and things that are fine wet. Each deserves a different home rather than being mixed in one compartment.
| Class | Examples | Recommended storage |
|---|---|---|
| Must stay dry | Phone, documents, electronics | Sealed pouch, ideally inside a roll-top |
| Survives dampness | Clothing layers, food | Roll-top within the main bag |
| Fine wet | Tackle boxes, tools, soft goods | Open drained compartments |
Keep the first class together in one small pouch rather than distributed. A single pouch can be checked once, moved quickly, and if necessary clipped somewhere higher, whereas several items scattered around inevitably leads to something being forgotten.
One Bag or Several
Both approaches have real merit, and the better answer for most paddlers is two containers rather than one or five.
| Approach | Advantage | Disadvantage | Best when |
|---|---|---|---|
| Single large unit | One tether, tidy deck | All eggs in one basket | Short sessions in calm water |
| Two medium units | Redundancy, better balance | Two things to secure | Most regular paddle days |
| Three or more units | Best distribution | Fiddly; slow to load | Long trips and expeditions only |
| Small pouch plus one container | Tools always with you | Pouch can be forgotten | Anyone changing rigs often |
Whichever applies, every item should be independently secured. Two points of failure cost nothing to arrange and prevent the situation where one slipped strap takes everything with it.
Purchase Checklist
Six checks before buying settle whether a bag will work on a paddle craft. None takes more than a minute, and each eliminates a common mistake that only becomes apparent on the water.
- Measure overall height loaded: anything above 200 millimetres is unsuitable for a board.
- Count the tie points: four, and check each is anchored into reinforced structure.
- Time the drainage: two litres should leave in under fifteen seconds with the bag upright.
- Ask for net buoyancy in kilograms, not a vague claim that it floats.
- Check the closure tolerates grit, since sand in a slide damages the seal permanently.
- Confirm every fitting is salt tolerant, ideally stainless rather than plated.
Bags passing all six tend to stay in service for years rather than seasons, which matters because the alternative discovery usually happens several hundred metres offshore.
Fitting Storage to Different Craft
Kayaks and boards subdivide further, and the differences change what fits. A sit-on-top with a rear well tolerates a crate-mounted system that nothing else can use. A touring-style hull with internal bulkheads suits soft hull bags instead. An inflatable board has far fewer attachment points than a rigid one, which often decides the entire approach before any bag is chosen.
| Craft | Storage space available | Sensible choice |
|---|---|---|
| Sit-on-top kayak with rear well | 300 x 400 millimetres or more | Crate bag plus one low deck unit |
| Sit-inside touring hull | Internal compartments behind hatches | Soft hull bags, nothing afloat |
| Rigid paddle board with D-rings | Six to ten tie points | Low-profile deck unit across the width |
| Inflatable board, few attachments | Two to four D-rings | Light bag leashed rather than strapped |
| Recreational two-person kayak | Generous central space | Two low units rather than one tall one |
Where a craft offers fewer than four attachment points, leashing becomes more important than distributed strapping. A single strong cord to one fixed point is better than three strained from positions never designed to take load.
Programme Notes
QUANZHOU JUNYUAN BAGS has developed waterproof bags since 2014 behind a founding group whose trade experience began in 2004. Output reaches 200,000 units monthly under SGS verification and BSCI and ISO 9001 governance; materials are screened for REACH and California Prop 65 and every lot is inspected at AQL 2.5 before release. Paddle storage is specified around drainage, tie point strength and net buoyancy rather than litres, because those are the figures that decide whether anything comes home.
Send target volume, maximum acceptable height, tie point count and rating, drainage requirement, whether buoyancy is required, closure type, colours, and quantity. Development opens at 500 pieces per design and colour, with six to ten working days for sampling and thirty-five to fifty days for bulk from approval and deposit, shipped FOB Xiamen or DDP to more than one hundred destinations. Send drawings to service@junyuanbags.com. Crate-mounted options appear on the kayak crate bag page, reviews sit in the kayak tackle bag roundup, and hull opening measurements are covered in the hatch size guide.
People Also Ask
What makes a tackle bag suitable for a kayak?
Low height, four strong tie points, drainage at every corner of the floor, salt-tolerant fittings, and enough buoyancy to keep it afloat if it goes over.
Does a paddle board need different storage from a kayak?
Yes, mainly because of height. Keeping cargo below about 200 millimetres preserves stability, whereas a kayak tolerates taller loads behind the seat.
Should a kayak bag be fully sealed?
No. Everything is wetted afloat, so a drained floor that empties in seconds beats a sealed floor that retains every litre.
How strong should tie-down loops be?
Each loop should hold around 50 kilograms of straight pull, with four loops arranged so opposing pairs can be crossed.
How much buoyancy is enough for paddle gear?
Two to three kilograms of net lift, usually achieved with three or four litres of closed-cell foam in the base and walls.
Where should the most-used items sit?
Within 600 to 700 millimetres of the seated paddler, because anything beyond that arc cannot be reached without losing balance.
Frequently Asked Questions
Q1. Why not use an ordinary backpack on a kayak?
It sits too high, has nowhere to tie down, retains water in the floor, and usually has no buoyancy. Each of those failures costs gear at some point.
Q2. What load height is safe on a paddle board?
Keep deck cargo below about 200 millimetres. Anything above 300 millimetres starts affecting stability noticeably and adds windage.
Q3. Do I need drainage in a paddle bag?
Yes. Any bag afloat takes water through closures and handling, and without drainage it carries that weight all session.
Q4. How many tie points should I require?
Four, each rated around 50 kilograms, positioned so that opposing pairs cross and cannot pivot the load.
Q5. Should I tether my tackle bag?
Always. Attach to fixed craft hardware with a cord of about 1.2 metres, never to yourself or to the paddle.
Q6. Will my bag float if it goes over?
Only if it has built-in buoyancy. Two to three kilograms of net lift keeps a partially loaded bag at the surface long enough to recover.
Q7. Can I store tackle inside the hull?
For backup only. Nothing beyond roughly 700 millimetres from the seat can be reached safely while afloat.
Q8. How do I keep bait separate from tackle?
Use a lined insulated compartment with its own 8 to 10 millimetre drain. Fabric interiors absorb residue permanently.
Q9. What colour suits paddle gear best?
Lighter shells stay cooler on hot decks and are easier to spot in the water, though they show dirt sooner than darker colours.
Q10. How often should I rinse paddle bags?
After every session. Salt dries onto closures and then abrades anything that flexes, and ultraviolet accelerates the damage.
Q11. Can I carry a rod secured to my bag?
Yes with two anchors at least 300 millimetres apart and a closed lower cup, or along the deck on a board rather than upright.
Q12. What figures should I send when specifying paddle storage?
Target volume, maximum height, tie point count and rating, drainage size, buoyancy requirement, closure type, colours, and quantity.