A rod holder can be added to almost any tackle backpack for eighteen dollars in about fifty minutes, but only if the load path is understood first. A two metre rod with a reel fitted weighs around 450 grams and its centre of mass sits roughly 700 millimetres from the butt, so walking multiplies that into a repeated pull of about 30 newtons at the upper anchor, or roughly the same as hanging three kilograms there ten thousand times a season. That rules out hook-and-loop wrap and any single-point strap, and it makes a no-sew webbing clamp with two anchors twenty minutes apart the best first attempt. Carry at least two anchors, keep their spacing above 300 millimetres, and give the lower one a closed cup of 45 millimetres.
Two Methods That Work and Three That Do Not
Adding a rod holder is not difficult; it is just usually attempted with the wrong method. The ones that hold up share two properties: they spread the load across two points rather than concentrating it at one, and they transfer the weight into the frame or base of the bag rather than into a single panel of fabric. Everything else eventually tears out, slides off, or rotates the bag sideways while walking.
Ranking by reliability puts the no-sew webbing clamp first because it requires no irreversible modification and can be fitted in twenty-five minutes, followed by bolt-through with a backing plate for anyone willing to drill. Hook-and-loop wraps, single straps through a daisy chain, and adhesive-backed anything are the three that should be skipped. Adhesives in particular fail on coated fabrics: peel strength on PVC-coated polyester at twenty-five millimetres of bond width typically collapses above forty degrees or after one wet-dry cycle.
| Method | Holds rods up to | Install time | Reversible | Verdict |
|---|---|---|---|---|
| No-sew webbing clamp, two anchors | 2.0 m assembled | 25 minutes | Fully | Best first attempt |
| Bolt-through with backing plate | 2.4 m assembled | 50 minutes | Leaves holes | Best permanent fix |
| Rigid side tube lashed at two points | 1.8 m, reel fitted | 35 minutes | Fully | Best for rough ground |
| Rivet and washer into moulded base | 2.0 m assembled | 30 minutes | Permanent | Only with a moulded base |
| Hook-and-loop wrap | 1.6 m at most | 10 minutes | Fully | Slips when wet |
| Single strap through daisy chain | Anything briefly | 5 minutes | Fully | Rotates the bag |
Read the Bag Before You Drill Anything
The material decides the method. A bag with a moulded base, usually ethylene-vinyl acetate, has a structural floor that will take fasteners; a soft base usually does not, and anything bolted through a single layer of fabric will tear out under repeated rod loading. Press along the base and side seams to find whether there is a stiffener sheet inside, and check whether the side panel is single-layer or backed by foam and board.
Fabric weight is the next clue. A 1000-denier PVC-coated shell carries a webbing anchor well; a light 210-denier ripstop backpack does not, and no method will make it do so safely. With a soft, light bag the honest answer is to transfer the rod to a purpose-made holder rather than attempt the retrofit. comparisons of base construction, including moulded flooring, are set out in the moulded base breakdown.
The Load Numbers Behind a Rod Holder
Three numbers explain every failure seen in the field. The first is the mass of what is carried: a two metre rod at 180 grams plus a 250 gram reel gives about 430 grams total. The second is where that mass sits, roughly 650 to 750 millimetres from the butt once the reel is fitted. The third is dynamic amplification, since walking adds roughly two to two and a half times the static load on every stride.
Put those together and the upper anchor sees a cyclical pull in the region of 25 to 35 newtons, with short spikes beyond 60 newtons when the angler stumbles or jumps a ditch. Over an eight kilometre session at roughly eleven thousand strides, that is eleven thousand load cycles per session, which is why items rated by static strength alone are misspecified here. Cycle resistance, not ultimate strength, is the property that matters.
| Factor | Typical value | Effect on the anchor |
|---|---|---|
| Rod plus reel mass | 400 to 500 g | Sets the static pull |
| Centre of mass from the butt | 650 to 750 mm | Sets the lever arm |
| Dynamic amplification when walking | 2.0 to 2.5 times | Turns 4 newtons into 25 to 35 newtons |
| Stride count per eight kilometres | About 11,000 | Cycle fatigue dominates, not breaking strength |
| Spike load on a stumble | Above 60 newtons | Fails single-stitch anchors instantaneously |
Method One: The No-Sew Webbing Clamp
This is the right starting point for almost everyone because it costs nine dollars, needs no tools beyond a lighter and a pair of scissors, and can be removed without trace. It works by clamping a vertical webbing channel onto the bag using the existing compression straps, giving a rod two contact points spread as far apart as the bag height allows.
- Cut two lengths of 25 millimetre webbing, one to run vertically from top rail to base and one short piece for the lower cup.
- Slide the long length behind the existing side compression straps at three heights, so the load transfers into strap channels already reinforced by the bag build.
- Form the lower cup from a fifty millimetre piece of webbing folded into a closed loop and fixed with a bar tack stitch or a rivet through two layers; a forty-five millimetre pocket depth results.
- Add a piece of 20 millimetre closed-cell foam behind the webbing where the rod butt rests, so the butt cannot abrade the shell.
- Fit the top loop with a hook-and-loop closure so the rod can be released one-handed in under four seconds.
- Seal all cut webbing ends with heat to stop fraying, leaving three millimetres of melted edge.
Spacing is the variable that decides success, and the practical minimum between the two contact points is 300 millimetres. Below that the rod pivots under walking loads and the butt strikes the calf; above 400 millimetres even a long rod behaves. A thirty litre bag typically allows around 340 millimetres, a forty litre bag around 420, which is one reason larger bags suit rod carry better than their litre count alone suggests.
The Lower Cup: Closed, Deep, and Drained
Nine out of ten damaged rods were damaged while the bag was set down, not while it was worn. An open loop lets the butt slide straight through the instant the bag rests on a slope or the rod takes its own weight, and a rod standing on its butt on rock is a rod with a cracked tip section. A closed cup eliminates the entire failure class for about eighty cents.
Build the cup at least forty-five millimetres deep, since anything shallower lets a rod walk out when the bag leans. Give it a six millimetre drain hole at the base, because rods go away wet and an undrained cup is either frozen in winter or smelling within two weeks in summer. If the bag will see saltwater, use stainless rather than plated rivets in this position; the cup sits exactly where spray collects.
Method Two: Bolt-Through With a Backing Plate
Where the bag allows access to the inside of a panel and the user is willing to drill two holes, bolt-through is the strongest retrofit and the only one that comfortably carries a 2.4 metre rod. The principle is simple: nothing carries load through the fabric, because a backing plate clamps the panel between itself and an external receiver, and the fabric only has to resist clamping pressure rather than tension.
- Mark two positions separated by as much vertical distance as the bag allows, minimum three hundred millimetres, both lying over reinforcement or a seam junction rather than open fabric.
- Cut a backing plate from three millimetre HDPE at fifty by thirty millimetres per position, and drill it to match.
- Drill through from outside with a five millimetre bit, keeping twenty millimetres clear of any seam or edge binding.
- Fit M5 stainless bolts with flat washers outside and nyloc nuts inside, tightening to about two and a half newton metres, which is firm without crushing the coating.
- Seal the hole edge with a thin film of silicone before final tightening so water cannot wick into the panel core.
- Re-torque after the first session and after the third; everything settles slightly in the first hours of use.
Method Three: A Rigid Side Tube
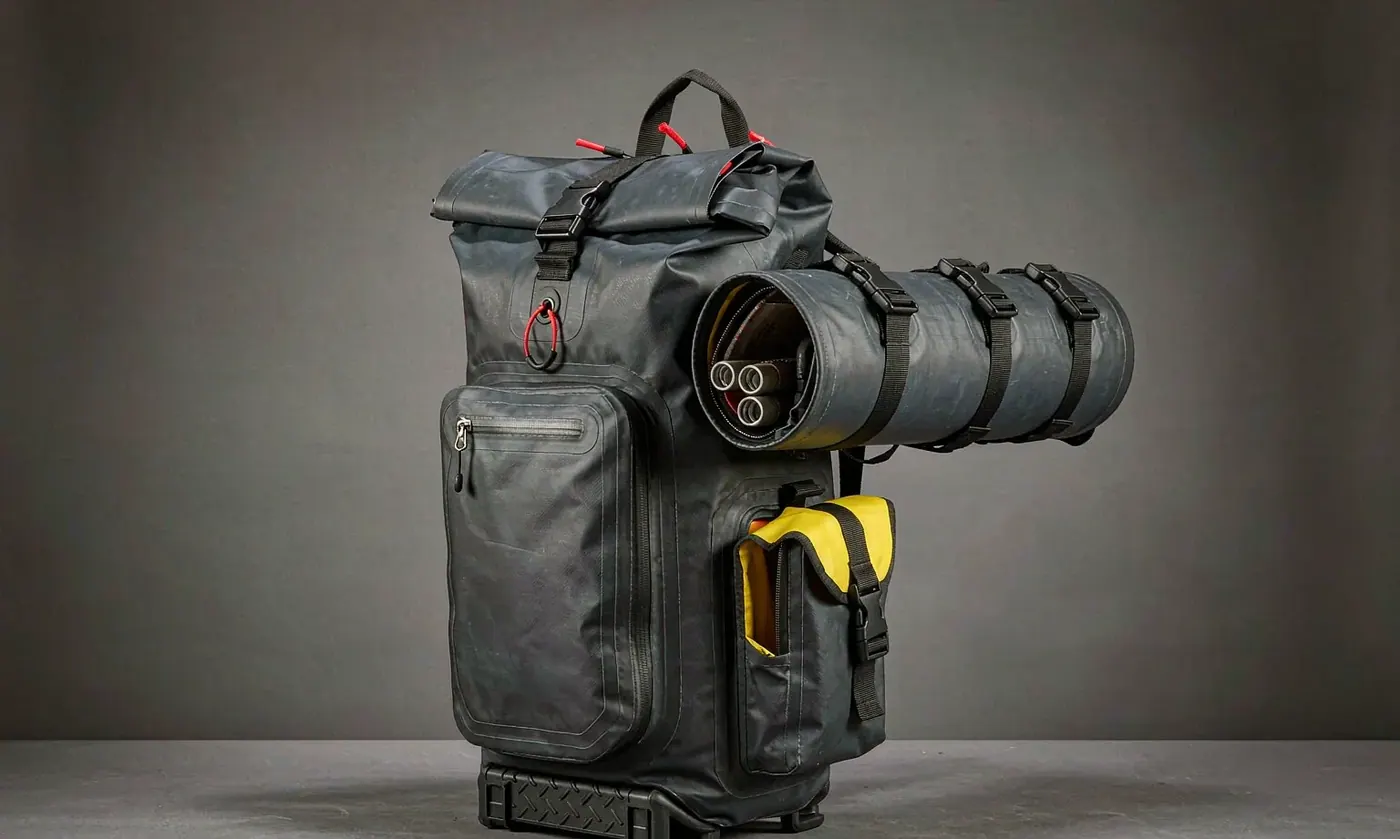
A tube is heavier and bulkier than straps and is the better answer for two specific cases: rough ground where any exposed rod takes knocks, and anyone wanting to carry a rod with the reel fitted and the line threaded. Fifty millimetre internal diameter schedule pipe cut to three hundred and fifty millimetres, with a glued end cap drilled for drainage, meets both requirements for about seven dollars.
Attachment needs two lashing points, ideally through existing daisy chain or pad eyes, with the tube angled ten to fifteen degrees off vertical so water runs out and the tip trails clear of scrub. Do not rely on zip ties alone; they creep under cyclic load and a tube sliding downwards by ten millimetres changes the whole geometry.
Method Four: Rivets Into a Moulded Base
Bags with a moulded base open a fourth route that leaves the side panels untouched. A twenty-five millimetre aluminium-backed receiver plate can be riveted to the base moulding with four millimetre rivets backed by twelve millimetre washers, and because loads here run downward into the strongest part of the bag, two rivets per side is adequate for rods to two metres.
Check the wall thickness before drilling anything: below five millimetres of moulding there is too little material for a rivet to grip and it will pull through. Five millimetres or more accepts rivets happily. This approach also keeps weight low, which matters because everything bolted to the base pulls the centre of gravity down rather than outward.
Shoulder Mounting for Short Walks
A single aspect of rod carry is often overlooked: what happens at the destination. Anyone fishing within a few hundred metres of the car does not need full walk geometry, and a single shoulder-level loop with a bungee across the top is lighter, quicker, and easier to reach. The trade is honest and should be stated plainly: a single-point mount is a carry aid, not a walking solution.
Set the single point high, above the shoulder line, with a six millimetre bungee retaining the rod against the body and a leash point so a released rod cannot fall far. Expect useful performance to roughly two hundred metres of gentle ground, beyond which the rod swings into the stride exactly as it would with any single-point design.
Balance and One-Sided Loads
One rod on one side creates a rotational pull, and the rotation is what tires the shoulder rather than the weight. A 430 gram rod held 250 millimetres out from the spine produces a constant turning moment of about one newton metre, and holding that against for two kilometres is noticeable in a way the same 430 grams carried centrally is not.
Two fixes, both free: carry two rods symmetrically where the fishing supports it, or alternate sides every twenty minutes on long walks. Where neither is possible, mount the rod as close to the spine as the bag geometry allows; thirty millimetres closer to the spine is worth more than any strap padding upgrade. Packing the heavier contents on the opposite side of the bag to the rod also offsets part of the turning moment.
Testing Before Trusting
Three checks catch essentially every retrofit failure and none requires equipment beyond a luggage scale, a bucket, and fifteen minutes. Run them dry first and wet second, since almost every surprising failure appears only after the webbing and shell have taken water and lost friction.
| Check | Method | Pass condition | Catches |
|---|---|---|---|
| Static pull | Hang five kilograms from the upper anchor for ten minutes | Under two millimetres of movement | Anchors that rely on friction alone |
| Cycle shake | Two hundred up-and-down pulls at walking rhythm | No stitch creep, no rotation | Single-strand webbing and single-stitch joins |
| Wet repeat | Soak ten minutes, then repeat both above | Results within ten percent of dry | Webbing that grips dry and slips wet |
| Set-down | Place the bag on a fifteen degree slope with a rod fitted | Butt stays in the cup | Open loops and shallow cups |
| Kneel clearance | Kneel as if landing a fish, bag worn | Rod tip clears ground by 150 mm | Poor vertical geometry |
Treat a failed check as information rather than discouragement. Most retrofits need one more contact point, one wider washer, or thirty more millimetres of spacing, and all three are ten-minute changes. What nobody should do is load a rod onto an anchor that moved during testing and assume it will settle; cyclical movement always gets worse rather than better.
Cost, Time, and Tools
The complete toolkit for any of these methods is a tape measure, scissors, a lighter, a five millimetre drill bit, and a small spanner, most of which is already in a kitchen drawer. Materials come to eighteen dollars for the no-sew route, twenty-four for bolt-through, and twenty-eight for a tube build, all including stainless rather than plated hardware, which should not be economised.
| Build route | Materials cost | Time | Tools |
|---|---|---|---|
| No-sew webbing clamp | Eighteen dollars | 25 minutes | Scissors, lighter, tape |
| Bolt-through receiver | Twenty-four dollars | 50 minutes | Drill, five millimetre bit, spanner |
| Side tube, lashed | Twenty-eight dollars | 35 minutes | Saw, lighter, scissors |
| Rivets into moulded base | Twenty dollars | 30 minutes | Drill, rivet gun |
| Shoulder single point | Twelve dollars | 20 minutes | Scissors, lighter |
Stainless over plated is the one place not to save. The difference across a build is four to six dollars, and plated hardware in a rod holder position, which is a natural splash collection point, corrodes fast enough to be visible inside eighty hours of salt exposure.
When to Stop and Buy Instead
There is a clean crossover. If the bag has a light shell under 400 denier, a soft unstructured base, and no frame or stiffener sheet, then none of the retrofits above will hold long term, and the money is better spent on a bag designed to carry rods from the start. The same applies if two or more modifications are needed just to get one rod carried correctly.
Built-for-purpose designs approach the problem differently: the load path runs into the frame rather than through a panel, the cup is moulded instead of stitched, and the spacing is set during development rather than by guesswork. Current examples are reviewed in the rod holder tackle backpack guide, and the full range sits on the fishing tackle backpack page. Fastener corrosion grades can be required using published material specifications from ISO.
Sourcing and Specification Notes
QUANZHOU JUNYUAN BAGS started its waterproof bag work in 2014, with a founding team in this industry since 2004. SGS-verified output reaches 200,000 units a month, under BSCI and ISO 9001 governance. Incoming materials are checked for REACH and California Prop 65 compliance, and outbound orders are inspected at AQL 2.5. Webbing and hardware strength values in a brief should always be tied to published test methods from ASTM International rather than stated as loose figures.
A rod-carrying brief should lead with rod count and the longest rod length intended, because those decide spacing, cup depth, and whether a tube is needed at all. Add litres, tray count, anchor method, fastener grade, colour, and quantity. Five hundred pieces per design and colour is the opening order size. Six to ten working days covers sampling, thirty-five to fifty days covers bulk from approved sample and deposit, and shipping runs FOB Xiamen or DDP to upwards of one hundred nations. Send briefs to service@junyuanbags.com.
People Also Ask
Can you add a rod holder to any backpack?
To most medium and heavy bags, but not to light ones. A shell of 400 denier or more with some structure accepts webbing or bolt-through anchors; a light unstructured pack will tear out under walking loads.
How much force does a rod put on a holder?
A 450 gram rod and reel carried at seven hundred millimetres produces 25 to 35 newtons of cyclical pull when walking, with spikes above 60 newtons on a stumble.
How far apart must the two rod contact points be?
At least 300 millimetres, and ideally 400 or more. Below that the rod pivots and the butt strikes the calf on every stride.
What makes a rod holder let go when the bag is put down?
An open loop instead of a closed cup. Build the lower cup at least 45 millimetres deep with a six millimetre drain hole, which removes the failure entirely for about eighty cents.
Are rivets strong enough for a rod holder?
Yes into a moulded base of five millimetres or thicker, using four millimetre rivets backed by twelve millimetre washers. Below that thickness rivets pull through.
How do I test a homemade rod holder?
Hang five kilograms for ten minutes, cycle two hundred pulls, then repeat both after soaking. Under two millimetres of movement is acceptable; any movement that grows is a fail.
Frequently Asked Questions
Q1. What is the easiest way to add a rod holder to a tackle backpack?
A no-sew webbing clamp using the existing compression straps: two contact points, a closed lower cup, twenty-five minutes, eighteen dollars, and no irreversible change to the bag.
Q2. How deep should the lower rod cup be?
At least forty-five millimetres with a closed base and a six millimetre drain. Anything shallower lets the rod walk out when the bag leans on uneven ground.
Q3. Will hook-and-loop hold a rod on a backpack?
Only for short rods under 1.6 metres and easy terrain. Hook-and-loop loses grip once wet, which is exactly when most failures happen.
Q4. What size internal diameter does a rod tube need?
Forty-eight to fifty millimetres for a rod with a reel fitted; forty millimetres takes a bare butt only. Cut the tube to about three hundred and fifty millimetres.
Q5. Can I bolt rod fittings through a waterproof panel?
Yes if the panel has structure behind it and you clamp rather than tension it. Use M5 stainless, a fifty by thirty millimetre backing plate, and seal the hole edge with silicone.
Q6. Why does one rod make a backpack feel awkward?
Because it applies about one newton metre of turning moment from 250 millimetres off the spine. Carry two symmetrically, alternate sides, or mount closer to the spine.
Q7. Is stainless hardware worth the extra cost?
Yes. Plated hardware in a rod holder position corrodes visibly within about eighty hours of salt exposure, and the difference across a build is only four to six dollars.
Q8. How long does fitting take from start to finish?
Twenty-five minutes for the no-sew clamp, thirty for rivets into a moulded base, thirty-five for a lashed side tube, and fifty for the bolt-through build.
Q9. When should I not attempt this retrofit?
When the shell is under 400 denier, the base is soft and unstructured, or two or more modifications would be needed to carry one rod correctly. Buy a rod-designed bag instead.
Q10. Do straps or a tube suit a fishing backpack better?
Straps are lighter and simpler; a tube takes impact, accepts a reel fitted, and allows a second rod to be drawn one-handed. Tube if changing method mid-session, straps if walking far.
Q11. What is the MOQ for a rod-carrying tackle backpack?
Development opens at 500 units per design and colour; six to ten working days covers sampling and thirty-five to fifty days the production run measured from approval and deposit.